
The Chopra Protocol for POTS and hEDS
I have just published a revised version of the protocol. Some changes.
Please email us at ccc102@proton.me and we can send you a pdf copy which is far more readable.
The Chopra Protocol
for
Postural Orthostatic Tachycardia Syndrome (POTS) and
Hypermobile Ehlers Danlos Syndrome (hEDS):
12‑Week Home-Based Treatment Program
Pradeep Chopra, MD
Center for Complex Conditions
www.painri.com
Assistant Professor (Clinical)
Brown Medical School, USA
ccc102@proton.me
This book is free for everyone to use. Why free? I learnt that patients with POTS and / or EDS were being charged enormous amounts to do harmful exercises. There are programs by major hospitals, private centers, books that were giving improper advice and charging a lot of money. I wrote this book because I believe knowledge should be free to share and to guide people with EDS and POTS correctly.
Version 2.0
Legal Disclaimer
This free booklet is provided for educational and informational purposes only. It is not intended to constitute medical advice, diagnosis, or treatment, and it does not establish a physician–patient relationship. The information contained herein is general in nature and may not be appropriate for all individuals, particularly those with complex medical conditions such as Postural Orthostatic Tachycardia Syndrome (POTS) and hypermobile Ehlers–Danlos syndrome (hEDS).
Exercise carries inherent risks, including but not limited to musculoskeletal injury, joint instability, autonomic symptoms, syncope, cardiovascular events, and exacerbation of underlying conditions. Individuals should consult their own physician or qualified healthcare professional before initiating, modifying, or discontinuing any exercise program, particularly if they have POTS, hEDS, craniocervical instability, cardiovascular disease, recent surgery, significant deconditioning, or other medical concerns.
Participation in any exercise program described in this booklet is voluntary and undertaken at the individual’s own risk. The author and publisher disclaim any liability for injury, loss, or damages arising directly or indirectly from the use or application of the information presented. No guarantees are made regarding outcomes.
If symptoms such as chest pain, severe shortness of breath, presyncope/syncope, new neurologic symptoms, severe joint instability, or worsening pain occur, exercise should be stopped immediately and medical evaluation sought.
All content is protected by copyright. No portion of this publication may be reproduced, distributed, or transmitted in any form or by any means without prior written permission of the copyright holder, except as permitted by applicable law.
Introduction
Postural Orthostatic Tachycardia Syndrome (POTS) is a challenging condition often worsened by deconditioning. Many patients feel so fatigued and dizzy that the idea of exercise seems impossible or even insulting. Yet, research shows that a carefully structured, gradual exercise regimen can significantly improve POTS symptoms by strengthening the muscles and expanding blood volume. Expensive POTS clinics and misconceptions have made some believe that only costly or high-tech treatments work – but in reality, consistent lifestyle changes and a phased exercise program can be done at home and often yield excellent results. This Chopra Protocol is a free 12-week plan for young adults with POTS and hEDS, focusing on “low and slow” progression. It emphasizes non-pharmacological treatments – like fluids, salt, and compression – alongside exercise. Always discuss with your physician before starting a new program, but know that these conservative measures are considered first-line therapy for POTS. The goal is to gradually build your tolerance and confidence over 3 months, without any special testing or physical therapy visits, using mostly home-based strategies.
Foundations: Lifestyle & Non-Pharmacological Strategies
Before starting on managing POTS, you must understand that POTS is a not a disease in most cases. It is the body’s normal response to fixing a problem. POTS can be present for several reasons. Here are some of the baseline treatments, but at the end of the day you will need to correct the underlying problem.
1. Venous blood pooling in the abdomen, pelvis, thighs and buttocks. This is true in hEDS where 80% of the blood pools in those areas.
2. Brainstem compression from Cervico Medullary syndrome and Cranio Cervical instability.
3. Small Fiber neuropathy
4. Autoimmune mediated anti-ganglionic acetylcholine receptor antibodies.
Effective POTS management starts with daily habits that support your circulation and autonomic nervous system. Implement these foundational strategies from Day 1 – they are as important as the exercises:
- Hydration & Salt Intake: Boost your blood volume by drinking enough fluids that your urine is light in color. It could be 1 liter or 2 liters, does not matter as long as your urine is light in color.
- Increase your salt intake (as advised by your doctor). The amount of salt is based on the sodium in the salt. You can use just regular salt. Does not have to be a fancy expensive salt
- Expanding your blood volume can be done by drinking more fluids. To keep the fluids in, you must increase your salt intake.
- How much fluid should you drink? Drink enough till your urine is light in color. If you notice that your urine is dark or darker in color, drink more water before your POTS symptoms worsen.
- Electrolyte solutions are no different from salt water. Most have added Potassium. Unfortunately, electrolyte solutions are also expensive. An easy way out is to drink your usual water, take your usual salt capsules or tablets and you can take over the counter potassium pill.
- Compression Garments: Wear compression shorts or an abdominal binder. 80% of your blood pools in the abdomen, pelvis, buttocks and thighs. There is no need to wear compression leggings. Most people do not like wearing compression leggings. Effective compression prevents blood from pooling in the buttocks, thighs and pelvis. They need not be very tight but comfortably tight. Put on compression gear in the morning before standing for long periods and use it during exercise if tolerated.
- Avoid Common Triggers: Be mindful of factors that can aggravate POTS symptoms. These include excessive heat (hot showers, hot tubs, or being outside on very hot days), dehydration, alcohol (causes vasodilation and fluid loss), large heavy meals (which divert blood to the gut), and prolonged standing (like waiting in lines). Try taking lukewarm or cool showers, eat smaller frequent meals, and when you must stand, shift weight, wiggle your toes, or discreetly march in place to keep blood flowing. Also, be cautious with caffeine or energy drinks – some POTS patients feel worse with them, while others tolerate small amounts; monitor your own response.
- Physical Counter-Maneuvers: Learn and practice quick techniques to relieve dizziness when you feel an episode coming on.
- leg-crossing and muscle tensing (cross your legs and squeeze your thighs/buttocks),
- squatting down, or
- standing on tiptoes can help push blood upward.
- Gripping a rubber ball or clenching your fists can raise blood pressure transiently.
- Even lying down or sitting and elevating your legs at the first sign of lightheadedness can abort a faint.
- These maneuvers are short-term fixes for acute symptoms – use them whenever you need a quick boost to prevent fainting, especially during the program if you get symptomatic.
· For hEDS, do not exceed your range of motion. When moving your stop short of reaching the extreme.
· For all exercises do not push yourself. Stay, under your maximum limit of your exercise
The 12-Week Exercise Protocol
Overview: This graduated exercise plan is designed for POTS rehabilitation tailored for home use. The program is divided into weekly stages, starting with gentle horizontal (reclined) workouts and very short durations. We will slowly increase the intensity and length of exercise, and only later introduce upright exercises as your tolerance improves. The motto is “start low and go slow.” Each week builds on the last – but only progress as your body allows. It is normal to feel fatigued or have symptom flare-ups in the first few weeks; this does not mean harm is being done. If a week’s plan feels too difficult or you miss too many sessions (due to illness or other issues), repeat that week rather than pushing ahead. It’s okay for this 12-week program to take you 16 or 20 weeks – everyone progresses at their own pace. The ultimate goal by ~3 months is to be exercising most days of the week, ~45 minutes per session, including some upright activity. But if you’re not there yet by week 12, don’t worry – you will still have made significant gains in stamina.
General Instructions: Aim for at least 3 days of cardio exercise per week to start, working up to 4–5 days/week by the end. On “off days,” try to stay lightly active (gentle walks or stretching) rather than complete bedrest, as consistency is key. Avoid taking more than 2 consecutive days off from exercise if possible. Incorporate strength training 1–2 days per week, focusing on the legs and core muscles, which act as natural pumps to return blood to the heart. Strength sessions can be short (15–30 minutes) and done on the floor or seated to minimize orthostatic stress. Always begin each workout with a 5-minute warm-up (e.g. gentle stretching or light cycling with no resistance) and end with a cool-down. Use a talk test to gauge intensity: in early weeks keep exertion mild to moderate. You should be able to converse during exercise; if you’re too breathless to talk, slow down. As you get fitter, you can aim for some sessions at higher effort in later weeks, but this is optional and only if well-tolerated. It’s very helpful to monitor your heart rate with a fitness watch (Apple Watch). Your doctor may suggest a target heart rate zone for you; a common guideline is to keep your heart rate below ~75–85% of your max (which is roughly 220 minus age) during most of the training. For example, if you are 20 years old with a max HR ~200, you might aim to stay ~150–160 bpm or lower in the beginning. If standing causes your heart rate to spike rapidly, staying recumbent for exercises will help control that. Listen to your body – feeling tired is okay, but stop and rest if you feel faint, clammy or very unwell. It’s fine to break a session into smaller chunks with rest in between.
Caution: Do not do any head or neck exercises even if you do not have any neck symptoms. People with EDS are prone to developing neck issues. Holding your head up in a seated position is enough exercise for your neck muscles.
Track your heart rate: Use an Apple Watch if you own an iPhone or a FitBit that synchronizes with your phone, if you do not use an iPhone. Avoid using other devices like rings, arm bands.
Below is the week-by-week plan:
Week 1 – Laying the Groundwork
Focus: Begin with simple recumbent exercises. The goal this week is just to get moving a little, in a way that doesn’t trigger symptoms.
Week1: Supine Foundation (Weeks 1–2+) – Isometric Core and Limb Activation
Frequency: Start with 5–10 minutes per session, once daily (or even split into two very short sessions, morning and evening). Do at least 3 days/week, building up to doing these exercises daily as tolerated. The intensity is low – you are learning to “turn on” muscles. These can be done every day because they are gentle; if muscle soreness occurs, take a rest day. Remember that with hEDS, consistency is key to build neuromuscular control but also avoid doing so much that you trigger pain. It’s okay if the movements feel very easy – at first the goal is simply to reawaken the muscles and improve your confidence. As this gets easy, you’re ready for week 2.
Suggested Supine Isometric Exercises: (Perform ~5–10 reps of each isometric hold for ~5–10 seconds each, resting between, once or twice daily as tolerated.)
- Transverse Abdominal Bracing: Lying on your back with knees bent, gently draw in your lower abdomen as if zipping up tight pants, engaging deep core muscles without moving your spine. Hold 5 seconds while breathing, then relax. This strengthens core stability around your spine. (Tip: You should feel tension in your lower tummy, but no back or neck strain.)

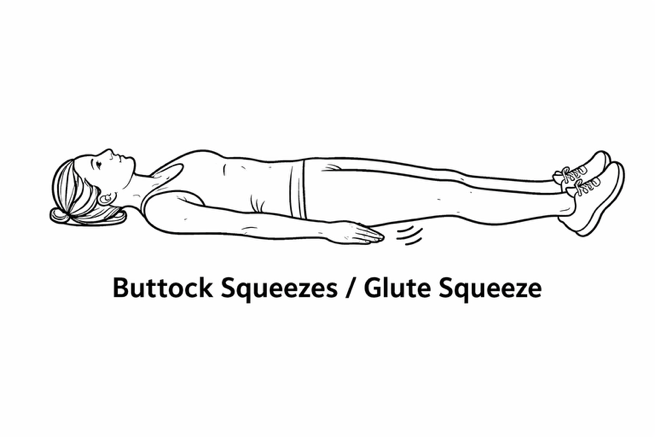
- Gluteal Sets (Buttock Squeezes): In the same position, squeeze your buttocks together firmly, hold ~5 seconds, then release. This activates your gluteal muscles which stabilize the hips and pelvis.
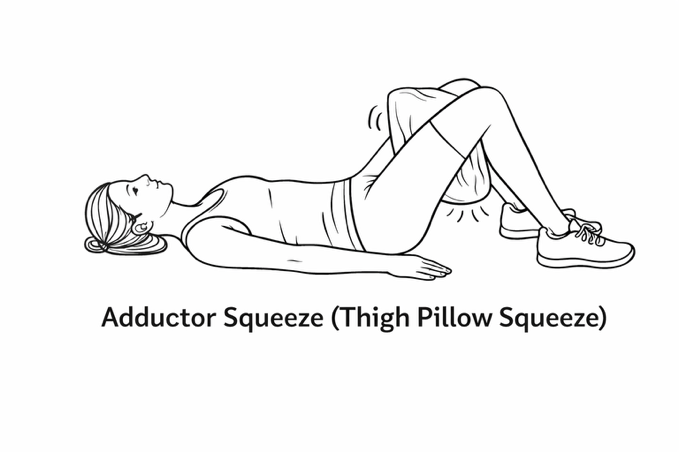
- Thigh Pillow Squeeze (Adductor Squeeze): Place a folded pillow or small ball between your knees. Gently squeeze your knees together against the pillow and hold for 5–10 seconds, then relax. This isometric exercise engages the inner thigh muscles and pelvic floor, supporting your hips and core.
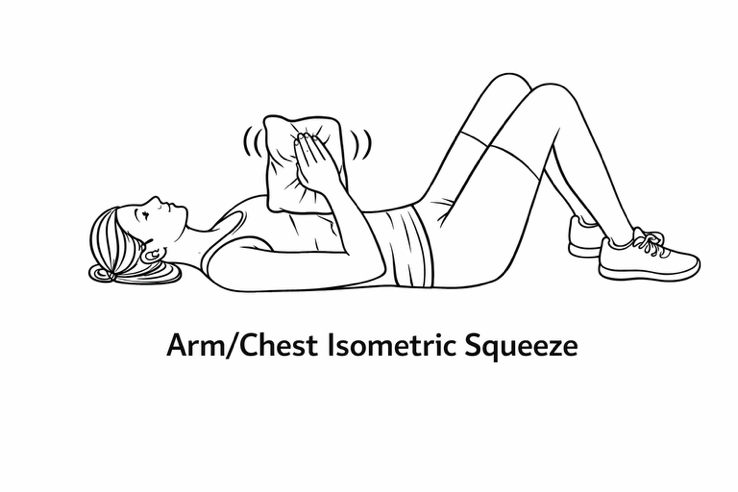
- Arm/Chest (Isometric) Squeeze: Hold a pillow between your hands (palms pressed inward at chest level, like a prayer pose) and squeeze it by pressing hands together for 5–10 seconds. This activates the chest (pectoral) muscles and shoulders without joint strain. Alternatively, you can press your palms together without a pillow. Keep your neck relaxed against the floor.
- Thigh muscle strengthening (Quad) Set: Lie with legs straight; tighten your thigh muscles as if you’re pressing the back of your knee down into the bed. Hold 5 seconds, then relax. (If needed, put a small, rolled towel under your knee for feedback.) This strengthens the quadriceps on the front of the thigh to support the knees.

- Ankle Pumps and Circles: Gently flex and point your feet (as if pressing a gas pedal) for 10–20 repetitions and make slow circles with your ankles. This isn’t heavy exercise but improves circulation and keeps the calves active, which can help reduce blood pooling in POTS and make your calf muscles stronger in hEDS. You can also “spell” the alphabet in the air with your feet to make it fun.
Week 2: Progressive Supine & Seated Exercises (Weeks 2–4+) – From Isometric to Light Dynamic
Focus: In week 2, we progress some exercises from static holds to gentle movements and introduce light resistance as tolerated. You will remain mostly supine (and begin some seated activity if you are not lightheaded) but now incorporate small ranges of motion. The aim is to begin strengthening through movement without compromising joint stability or triggering POTS symptoms. We continue to prioritize large muscle groups (core, hips, legs, shoulders) and gradually increase the challenge by adding resistance bands or light weights (1–2 lb.) for arms/legs.
POTS note: Continue doing most of the exercises lying down or reclined at this stage; any seated work should be done with a back support and introduced slowly (start with just a few minutes). Always have your walker or a chair nearby if you need to grab it when sitting up and continue wearing compression shorts during exercise if you find it helpful. Try to have someone monitor you when you first start doing a new exercise to make sure you are safe and have the correct form.
New Exercises in week 2 (Add these gradually, a few each session): (Perform 1–2 sets of ~5–10 repetitions each movement, at least every other day. Keep effort mild–moderate; you should be able to talk during exercise – a “talk test” to ensure moderate intensity.)
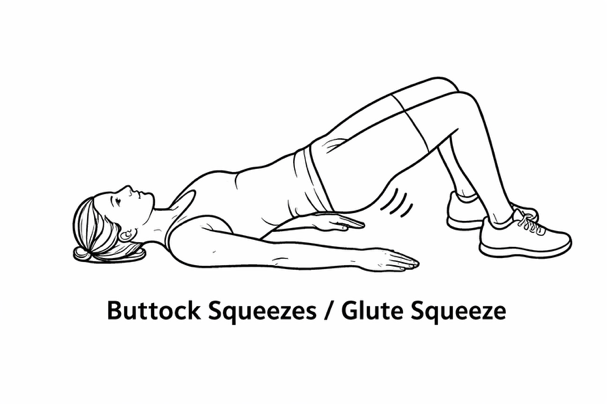
- Bridge (Glute Bridge, partial): Lying on your back with knees bent and feet flat, engage your core and squeeze your glutes, then slowly lift your hips a few inches off the bed. Hold 2–3 seconds, then gently lower down. Start with a small lift (not a full arch) to keep strain off your lower back and neck. This dynamic exercise builds on your gluteal isometrics to strengthen the back of your hips and thighs. Keep your neck relaxed (you might use a pillow) and avoid pushing up too high initially.
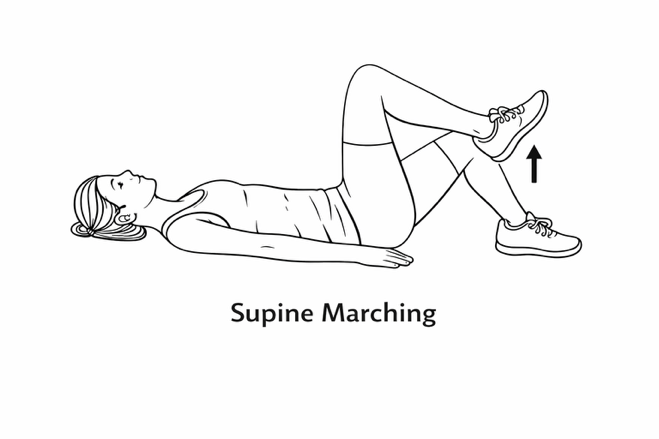
- Supine Marching: Lie with knees bent. Engage your abs, then lift one foot a few inches off the bed (as if marching) and lower it, then lift the other foot. Keep your low back flat and move slowly with control. This strengthens hip flexors and core while training stability (your pelvis should not rock side-to-side). March in place for ~10 total lifts (5 each leg) if tolerated.
- Bent-Knee Fall-outs: From the same lying position (knees bent, feet on bed), let one knee slowly and controlled drop a few inches outward to the side (without moving your pelvis), then bring it back up. Alternate sides. This works hip and core muscles and improves hip stability (do not let the opposite hip lift). Only go as far as you can control – avoid letting the knee flop out to a painful range. This is a gentle mobility and core control exercise often used in hypermobility rehab.

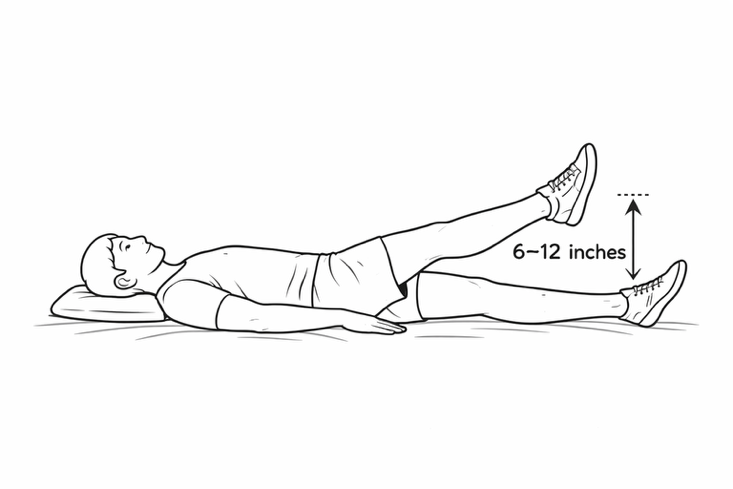
- Straight Leg Raise (SLR), short arc: You can try a partial leg raise. Lying flat, keep one leg bent for support and the other leg straight. Tighten the thigh and lift the straight leg 6–12 inches off the bed, then slowly lower. Do 5 reps per side. Ensure you don’t hyper-extend your knee – keep a soft bend. This strengthens the thigh muscle through range. If it’s too hard, place a rolled towel under the knee and just lift the heel (shorter arc).
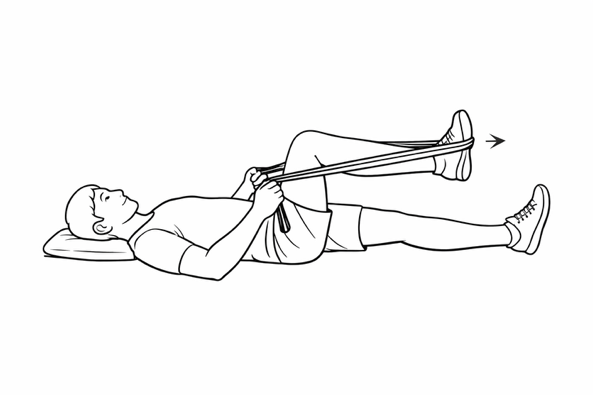
- Resistance Band Press (Leg Press or Kick-outs): Using a light resistance band (TheraBand), yellow or red band, you can simulate leg strengthening without standing. For example, tie a band in a loop. While lying down, loop it around one foot and hold the ends in your hands. Starting with the hip and knee bent, gently push your foot forward against the band (like a leg press), then slowly return. Do 5–8 reps per leg. This adds a bit of resistance to build muscle. Caution: Start with the lightest band (yellow band) and ensure smooth, pain-free motion. The band provides gentle load without weights.
- Recumbent Cycling (Stationary Pedaling): If you have access to a recumbent stationary bike (or a portable pedal exerciser), you can introduce very light cardio now. Keep the seat reclined or use back support so you’re not fully upright. Start with ~5 minutes of easy pedaling most days (e.g. 5 days/week). Go at a comfortable pace – you should feel only mild exertion. This helps improve your endurance and leg circulation without the stress of standing. If you don’t have a bike, an alternative is to use a small set of free-standing pedals on the floor or even on your bed. You can lie down and pedal, or do it seated with support. Even gentle cycling like this can benefit POTS by moving your muscles gradually, pumping blood, while avoiding orthostatic symptoms. You can do 5 minutes of recumbent biking 5 days a week and increasing by 30 seconds each week, as tolerated, aiming eventually for 20–30 minutes over months.

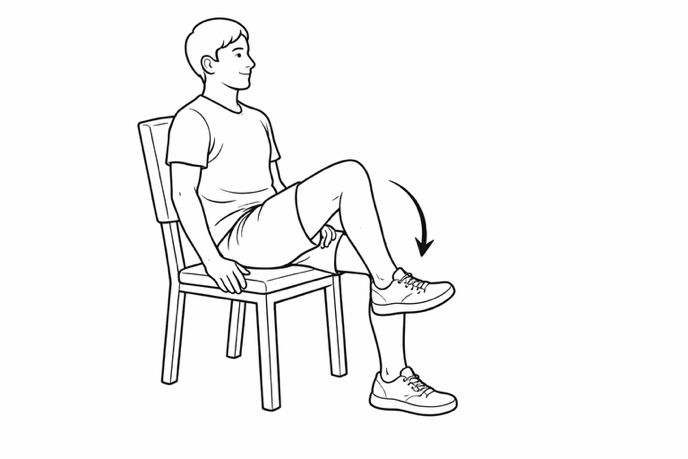
- Seated Posture Drills (as tolerated): Begin to practice sitting upright for short periods to build orthostatic tolerance and core endurance. For example, sit on the side of the bed or a chair with a tall back. Use your arms or a walker for support if needed. Sit for 1–2 minutes, focusing on good posture. You can do gentle movements in sitting like Seated Marching (lift one knee at a time a few inches, like a mini march while seated) or Seated Toe Taps (tap your toes on the floor alternately) to keep your legs active without standing. These mimic some upright activity but in a safer seated position. If sitting causes dizziness, recline again and continue mostly supine work; you can try again in a few days.
- Lifestyle: By now you should be getting into the routine of daily salt and water – it’s vital to keep this up, especially as your activity increases (you will sweat out fluids/salt). This week, take note of any patterns in symptoms: for example, are mornings hardest? If so, try doing some gentle leg exercises in bed (leg squeezes, ankle pumps) each morning before you even stand up – this can jump-start circulation. Continue using compression shorts daily. Avoid hot environments; if you want to try a bit of outdoor walking for fresh air, go in the cooler morning or evening and keep it short (5-10 minutes, flat terrain, with someone accompanying you, Apple watch on and phone). Integrate rest into your day: POTS can cause fatigue, so listen to your body and incorporate short naps or elevating your legs when needed, separate from the exercise sessions.
Frequency: Continue with ~10–20-minute sessions, ideally daily or every other day. You might divide the routine: e.g. do strengthening exercises (bridges, leg raises, etc.) on 3 days a week, and do recumbent cycling or gentle cardio on 4–5 days a week. It’s okay to do core activation (like the week 1 exercises) daily – they can serve as a warm-up each session. Always pace yourself: “small manageable baseline” amounts of exercise that do not flare symptoms are key. For example, start with one set of each new exercise. If you feel good the next day, you can repeat and gradually add a second set or a few more minutes of biking. If any exercise consistently causes joint pain or increased symptoms, scale it back or skip it for now. By the end of Week 2, you should notice you can do more reps or minutes with less fatigue. When you can tolerate about 15–20 minutes of mixed supine exercises and can sit upright for several minutes without POTS symptoms, you’re ready to add more weight-bearing work in Week 3.
Week 3 – Gradual Progress
Focus: Increase exercise duration further while maintaining a recumbent focus. By now, you may notice slightly improved stamina (perhaps you don’t get as winded doing 10 minutes as you did before). Week 3 is about continuing the slow build and solidifying habits.
- Cardio (3–4x per week) with recumbent bike: Aim for 15–20 minutes per session this week. If you’re still around 10 minutes comfortably, try adding 2–5 more minutes to each session. Those who started at higher capacity might reach 20 minutes continuously now. You might also add a 4th cardio day this week if you’re tolerating 3 days well. For example, do recumbent bike on Monday, Wednesday, Friday, and add a light session on Saturday. Keep all cardio horizontal or reclining with a back rest and at a moderate effort (you might be able to increase intensity slightly, “fairly light to somewhat hard,” but avoid anything that feels very hard). Always include that warm-up and cool-down. By the end of this week, some people might accumulate ~60 minutes of recumbent exercise total for the week (e.g. 4 days × 15 min), which is great. Others might be at ~45 minutes total – that’s fine too.
- Strength (2x per week): If not already doing 2 days weekly, try to do two strength sessions this week (e.g. Tuesday and Saturday). Focus on increasing reps or sets rather than adding heavy weight. For instance, if you did 2 sets of 10 bridges last week, try 3 sets of 10 this week. Introduce one new exercise if you can, to engage slightly different muscles: e.g. seated calf raises (sit and mimic rising up on your toes to work calf muscles; you can press down on your knees with your hands for added resistance) or side-lying leg lifts (lying on your side, lift the top leg to work hip muscles, 10 reps each side). Continue to emphasize legs and core. By the end of this week, you may be doing ~10–15 minutes per strength session. Make sure to take at least one rest day after a strength day to let muscles recover (light walking or stretching is okay on rest days).
- Lifestyle: As your exercise time creeps up, pay attention to post-exercise POTS symptoms. Some people experience a headache or more fatigue later in the day after exercising – this can often be mitigated by hydrating well and having a salty snack after workouts. It’s a good idea to check your blood pressure and heart rate periodically (for example, in the morning, and after exercise) to see trends. If your resting BP is very low (e.g. < 90/60) or HR very high, talk to your doctor about adjusting fluids/salt or using medications if needed. Continue all the previous lifestyle measures (compression, fluids, etc.). This week you could try a salt-loading drink if you haven’t: e.g. a cup of broth or a sports drink before your workout to see if it improves exercise tolerance. Also, practice those counter-maneuvers in real time: for example, if you get dizzy upon standing immediately squat down or cross your legs – make this a habit to prevent syncope.
Week 4 – Recumbent Endurance Phase
Focus: By week 4 (Wow!!), the aim is to reach close to 20+ minutes per cardio session, and to build a solid exercise routine that will serve as your foundation. We’re still avoiding upright exercise – this entire first month is about horizontal training to condition your heart without orthostatic stress.
- Cardio (4x per week): Try to exercise on four days this week, if possible. Each session, target 20–25 minutes of recumbent cardio. If you can do 20 minutes straight, that’s excellent – maintain that. If not, break it up (e.g. two 10-minute bouts with a short rest). Mix and match recumbent modalities if you have access: for example, 10 minutes on a rowing machine then 10 minutes on a recumbent bike can add variety. The intensity should still be moderate – you might find you can handle a bit more resistance or a slightly faster pace now without symptoms, but don’t push into anything near maximal. By the end of this week, you may accumulate ~40 to 60 minutes of cardio for the week. This consistent training is strengthening your muscles and improving your circulatory reflexes, even if you don’t feel huge changes yet.
- Strength (2x per week): Continue twice weekly strength sessions focusing on the lower body/core. This week, work on quality of movement and maybe add a bit more challenge. For example, you could try wall sits (sit against a wall as if in a chair, thighs parallel to floor) and hold for 10–20 seconds, which strengthens thighs – but be cautious as this is technically upright; do this only if you feel stable and do it near a friend or railing. Alternatively, increase resistance band tension for seated exercises. If you have access to a gym or home weight machine, you might incorporate seated leg press or leg extension machines on low weight.
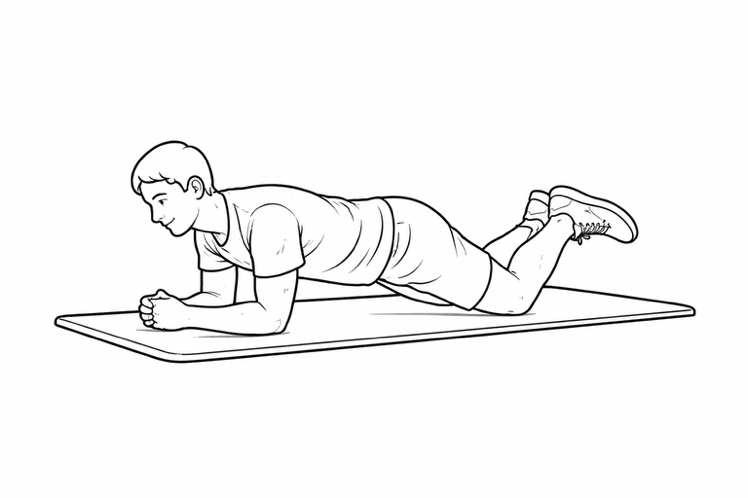
- Core-wise, you can try a few planks but do them on knees (modified plank) to start, and only if you can get down and up safely. The strength sessions could be ~15–25 minutes each by now. Remember to engage your core muscles during leg exercises too (it helps stability and works your abdominal muscles isometrically).
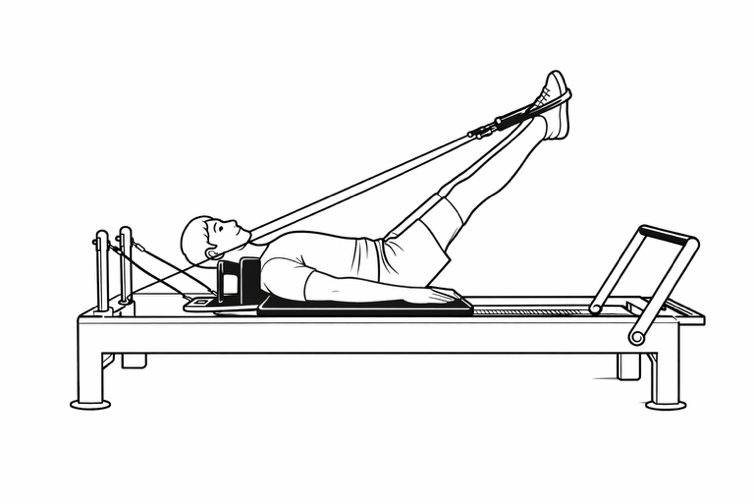
- Pilates using the Reformer (not mat Pilates) for core and limb strengthening. Introduce exercises as tolerated under the guidance of a teacher. Do not join a class but ask for private sessions. Remember ‘start low go slow’.
- Assessment: Week 4 is a good point to evaluate your progress. Can you tolerate mild activity better than a month ago? For example, maybe climbing a flight of stairs isn’t leaving you as winded, or you can stand a few minutes longer in the shower. These small improvements mean your efforts are working – celebrate them! At this stage, some patients report a slight decrease in resting heart rate or less brain fog. If you haven’t noticed any difference yet, don’t be discouraged; improvements in POTS can be slow and subtle. Ensure you’re not overdoing outside of exercise – prioritize good sleep (POTS can worsen with poor sleep). Continue to avoid big triggers. From next week onward, if all has gone well, we’ll consider adding a tiny bit of upright activity. But if you’re still very symptomatic just doing recumbent work, you may choose to continue a purely horizontal program for another few weeks before changing anything – that’s perfectly okay (everyone’s timeline can differ).
Week 5 – Transition Begins (Introducing Light Upright Activity)
Focus: Weeks 5–8 mark a transition phase. We will maintain our recumbent exercise routine but cautiously introduce small doses of upright exercise. By now, after about a month of training, many POTS and EDS patients can handle a bit more upright time without severe symptoms. We’ll also keep advancing strength training.
- Cardio (4x per week, introduction of upright 1x): Continue with 3 days of recumbent cardio (20–30 minutes each) as you have been doing. On the 4th day, try an upright cardio session in a very controlled manner. For example, you could do recumbent or upright stationary biking. If you don’t have a bike, you could attempt a treadmill walk or outdoor walk on flat ground. However, keep this upright session short – about 10 minutes is enough for the first trial. Monitor your heart rate and symptoms closely during this upright exercise. It’s normal for heart rate to be higher when upright; you may also feel more short of breath. That’s why we start with a short duration. If 10 minutes is too much, you can do 5 minutes upright, sit and rest, then another 5 minutes. (And if even a couple minutes upright provokes dizziness, stop and return to recumbent-only for now; you can try again in another week or two.) The other 3 recumbent sessions this week can be ~25–30 minutes each, possibly increasing intensity modestly on those since you’ve built a base.
- Strength (2x per week): This week, aim to increase strength training intensity slightly. If you’ve been using just body weight, consider using a resistance band or light dumbbells (if available) for exercises like leg curls, leg extensions, or seated chest press. For example, do seated banded leg extensions (loop a band around your ankle and a table leg for resistance) or use dumbbells for seated shoulder presses to include some upper body (but do these seated to avoid strain). Remember, keep your joints under their maximum range of motion. Continue to focus on legs: exercises like seated or lying knee tucks (bringing knees to chest) can work the abs and hip flexors at once. Time-wise, keep it ~30 minutes per session. Important: Breathe and take breaks; strength exercises can raise your blood pressure briefly, which usually is okay, but stop if you get a pounding headache or feel unwell. Also, no heavy free-weight lifting standing up yet – avoid exercises like standing deadlifts or squats with weights at this stage (these can be too challenging for the autonomic system now).
- Lifestyle & Symptom Management: With the introduction of upright exercise, you might experience a slight resurgence of symptoms as your body adapts to that new challenge. Plan your upright session for a day when you’re feeling relatively good and maybe have someone with you. Wear your compression shorts during that session for extra support. After the session, do a long cool-down (slow pedaling or slow walking, then lying down for a few minutes). Continue aggressive hydration and salt especially on upright-exercise days (some patients drink a large electrolyte drink 30 minutes before upright exercise to improve tolerance). Use your counter-maneuvers if you feel symptoms coming on during upright activity – for instance, you can periodically squeeze your butt and leg muscles while walking to help circulation. Finally, listen to recovery needs: you might need a bit more rest after the upright day; that’s okay. Ensure that on at least one of your rest days this week, you truly rest and recharge.
Week 6 – Increasing Stamina
Focus: In Week 6, consolidate gains by boosting endurance and upright exposure a bit more. By now you are roughly halfway through the program. This week looks to increase total exercise time and make the upright session a regular part of the routine (if Week 5’s trial went well).
- Cardio (4–5x per week): Try to exercise 5 days this week, if possible, with a mix of recumbent and upright training. For example: 3 days recumbent (30 min each), 2 days upright bike or brisk walking. The recumbent sessions can now be up to 30 minutes at moderate intensity – you might experiment with a slightly higher effort on one of these (perhaps a few 1-minute faster intervals in the middle of your bike/row session) to gently challenge your cardiovascular system. For the upright sessions, you could extend each to 15 minutes if you handled 10 minutes last week. It might work well to alternate days (e.g., Mon recumbent, Tue upright, Wed recumbent, Thu rest or light, Fri recumbent, Sat upright, Sun rest). Continue to prioritize flat or stationary upright exercises (no running yet). Treadmill walking can be introduced if you prefer it over biking – keep the treadmill flat (0 incline) and a comfortable walking speed (e.g. 2.5–3 mph). If walking outside, avoid hills for now and use caution with heat. By end of this week, your total cardio time could be ~120 minutes spread over 5 days, which is a substantial achievement! Many patients see improved orthostatic tolerance around this point – for instance, you might notice you can stand up a little quicker or with less heart racing than before.
- Strength (2x per week): Maintain two strength workouts, focusing on progressive overload. For example, if you’ve been doing 3 sets of 10 of an exercise, see if you can do 3 sets of 12–15. If you have access, this might be a good time to try gym machines for major muscle groups: leg press, hamstring curl, seated row, chest press, etc., keeping the weight light. These machines allow safe strengthening while seated. If no gym, continue with bands and bodyweight at home. By now, each strength session might include 5–6 different exercises (e.g. squats against a wall, bridges, leg raises, planks, seated band rows, bicep curls) covering legs, core, and a bit of upper body, with overall session length ~30 minutes. Note: Some muscle soreness is normal as you progress (usually peaking a day or two after the workout). If soreness is severe or triggers POTS symptoms (some people get reflex tachycardia when in pain), back off a bit. Gentle stretching and adequate protein intake can help muscle recovery.
- Checkpoint: At Week 6, you might do a quick reassessment. This is a good time to ensure your heart rate and blood pressure responses are still in a safe range as intensity climbs. Always keep an eye on your heart rate on your Apple watch. If you have a blood pressure cuff, you can check BP about 5 minutes after finishing a session – it might be a bit lower than your baseline due to vasodilation, which is normal, but ensure you’re not excessively hypotensive (e.g., upper reading BP <90). If you feel very weak or have chest pain or palpitations that are more than your “usual” POTS tachycardia, pause the program and consult your doctor. Most importantly, recognize the progress you’ve made: compare your Week 1 abilities to now. Perhaps you’ve doubled or tripled your exercise time – that’s fantastic. Many POTS patients feel a bit more energetic by this stage, though some might ironically feel more tired (because you’re doing more) – make sure to adjust sleep and nutrition to support your increased activity.
Week 7 – Uphill (Figuratively) but Forward
Focus: In Week 7, we continue to ramp up duration and integrate more upright activity. You’re now entering what might be considered the “intermediate” stage of the program. The blend of recumbent and upright should further improve your cardiovascular conditioning and orthostatic tolerance.
- Cardio (5x per week): Aim for 5 days of cardio again. You can now consider doing 2 upright sessions per week. For example, out of 5 days, do 3 recumbent (e.g. Mon/Wed/Fri) and 2 upright (Tue/Sat). Increase the duration of the upright sessions to 20 minutes each if you can, or at least strive for 15–20 minutes. The recumbent sessions remain around 30 minutes, but if you’re feeling good you could stretch one of them to 35–40 minutes as a challenge. At this point, interval training can be cautiously introduced once a week: e.g., during a recumbent bike session, alternate 2 minutes of a slightly faster pace with 2 minutes of easy pace, for a few cycles. Interval work can boost fitness, but ensure your heart rate and symptoms stay in control (intervals should be “somewhat hard” but not exhausting). Always follow an interval day with a lighter “recovery” day – for instance, if you do intervals on Wednesday, make Thursday a short, easy walk or rest. By the end of week 7, your weekly cardio volume might be ~150 minutes total, approaching the general exercise recommendations for healthy individuals.
- Strength (2x per week): By now, strength training can be at full frequency (twice a week) with perhaps a bit more challenge. If available, you might add exercises like seated weighted squats using a chair with arm rests (sit-to-stand from a chair while holding a light weight or just bodyweight, which is a functional movement). Just be cautious to stand slowly and use support if needed to avoid dizziness. Continue to emphasize the lower body: stronger glutes, quads, and calves will significantly aid orthostatic tolerance. You may also include some balance exercises if feeling confident (e.g., seated balance on a therapy ball, or standing with support on one leg for 10 seconds – stork standing) – these can gently train your autonomic system and leg muscles together. Keep in mind any connective tissue issues (for EDS/hypermobility, wear joint braces as needed and avoid hyperextending joints). Keep any eye on your heart rate on your Apple watch.
- Lifestyle: Around this time, consider adding or adjusting daily activities to be more upright to complement your training. For example, if you usually avoid standing, you might start doing a bit more of it in controlled bursts – such as standing for 5 minutes every hour to get your body accustomed to upright posture (using the counter-maneuvers during those 5 minutes). Many find that their overall daily upright time increases as their exercise capacity increases. Track simple metrics like how long you can stand preparing a meal, or how many steps you take in a day (you Apple watch can tell you how many steps). Ensure you’re still doing well with salt/fluid – some people need even more salt as they become more active (your doctor can check your blood sodium or urine sodium if unsure). Keep practicing good pacing: you are doing more exercise now, so you might need to scale back other strenuous chores or activities to avoid total exhaustion. It’s all about balancing activity and rest. If you have reached here or close to this point, I am proud of you.
Week 8 – Recumbent + Upright
Focus: By the end of Week 8, you’ve likely transitioned into doing a mix of recumbent and upright workouts regularly. This week we consolidate that pattern and prepare to possibly advance to more challenging upright forms in the final month.
- Cardio (5–6x per week): If you can, attempt 6 days of exercise this week (this could include lighter “active recovery” sessions). For example, you might do formal cardio on 5 days (3 recumbent + 2 upright as before), and on the 6th day just take a gentle walk or do light yoga as active recovery. The duration for formal cardio sessions can be 30–35 min recumbent and 20 min upright on average. If you’re feeling ambitious and symptom-free, you could try one session of 40+ minutes recumbent to see how you handle a longer endurance effort. Upright sessions might also be combined with recumbent: e.g., 10 minutes recumbent bike then 10 minutes upright walking in the same session (transition slowly between positions). This kind of mixed session can gently train your body to adjust between positions. By now, some may want to try a slightly more upright machine like an elliptical (without arms) on very low settings. You can experiment with an elliptical for a few minutes during one of your upright days – it provides a good cardio workout but monitor for dizziness, as it’s a higher upright challenge. It’s not necessary if you prefer sticking to bike and walking for now. Bottom line: maintain frequency and time – you should be nearing the program’s peak volume.
- Strength (2x per week): Continue twice-weekly strength. You might find by now that these sessions feel easier relative to before, or you’ve significantly increased weights or reps. Keep focusing on leg and core. If tolerated, you could incorporate one or two standing strength exercises in each session now, to further train your orthostatic resilience – e.g., standing calf raises (hold a chair, do 15 calf raises slowly) or light standing dumbbell curls/shoulder presses. Do these at the end of your routine so that if you do feel symptoms, you’re close to done and can recover. Always follow a standing set by either sitting or doing a muscle-tensing maneuver to keep blood pressure up. This little addition will pave the way for more functional training in the future. Overall, aim to cover all major muscle groups across the two sessions (legs, glutes, core, back, arms) – strong core and arm muscles can also help you tolerate daily activities better (like carrying groceries or doing house chores without getting as winded).
- Milestone: Completing Week 8 means you’ve done two-thirds of the program! Patients typically start seeing real improvements in their POTS symptoms and can initiate upright biking or walking. If that describes you – fantastic! You may notice, for example, that when you stand up your heart rate doesn’t soar quite as high as it used to, or you can be active longer before brain fog kicks in. If you’re still struggling with symptom control, don’t be discouraged; some patients take longer or need to incorporate medications to assist. Consider consulting your doctor if things are not improving – perhaps adjusting your medicines could help. But many will continue improving with exercise alone given more time. As you head into the final stretch of the program, double down on healthy habits: regular bedtimes, nutrient-rich diet (ensure you’re getting enough iron, B12, and electrolytes, as deficiencies can worsen fatigue and dizziness).
Week 9 – Advanced Upright Training
Focus: Weeks 9–12 – emphasizing upright exercise and higher intensity, as tolerated. In Week 9, you will push a bit more on upright cardio, while maintaining the base you’ve built.
- Cardio (5–6x per week): Shift the balance further toward upright exercise. For instance, out of 5 main cardio days, try 3 upright sessions and 2 recumbents. Upright sessions can include continued stationary biking upright, An alternative is to increase the incline on a treadmill slightly to make walking more intense. Aim for 20–25 minutes of upright exercise per session now. Your recumbent days can be used as “recovery” cardio – e.g., an easy 30-minute walk in water or bike ride to give your body a break from gravity while still moving. You could also incorporate intervals on upright days now, if feeling strong: for example, on the bike do 5 minutes easy, then 5 cycles of 1 minute faster + 2 minutes slow, then a cool down. This trains your cardiovascular system to handle spikes in effort. By the end of this week, your peak upright heart rate during exercise might approach what it was in recumbent earlier – this is okay as fitness improves but ensure it doesn’t exceed your target safe range significantly. Use your heart rate or perceived exertion to modulate intensity.
- Strength (2x per week): Continue as in prior weeks, with a mix of seated and some standing exercises. If you’re confident, you can try more functional moves like lunges or full squats without weight, but these can be orthostatically challenging, so have support (do near a rail or wall) and don’t do many reps if you get dizzy. It’s fine if you choose to keep all strength exercises seated/floor – you’re still gaining muscle. By week 9, the weight or resistance you use can be increased a notch if everything has been easy. For example, if using resistance bands, go to a stronger band; if lifting 5 lb dumbbells, try 8 lbs, etc. Keep good form and don’t strain. Total strength workout time might still be ~30 minutes, which is fantastic. Keep an eye on your heart rate.
- Symptom check: As you incorporate more upright work, ensure you’re using your tools to manage orthostatic stress: wear compression shorts during upright exercise, preload with fluids, and possibly consider salt tablets or electrolyte drinks shortly before exercise if you haven’t tried that (some patients take salt capsule 30 minutes before a workout to help maintain blood pressure – check with your doctor if this might be appropriate for you). POTS symptoms can fluctuate (some days are bad despite progress), so don’t be alarmed by a bad day – just adjust and do a lighter session or rest and try again the next day. If you had started any POTS medications before, you might even find you can reduce them now (with medical guidance), as exercise often improves symptoms to the point that medications like beta blockers might be tapered. Always involve your physician in such decisions.
Week 10 – Pushing the Envelope
Focus: By Week 10, you’re nearing the end of the formal program. The objective now is to challenge yourself within safe limits, approaching the levels of exercise typical for healthy individuals. This week you’ll work towards longer sessions and possibly higher intensity spurts.
- Cardio (5–6x per week): Try to hit the upper end of our time goals. For example, set a target of 30 minutes upright on at least one or two days this week, and 40+ minutes recumbent on one day. The other days can be ~30 minutes as usual. Essentially, have one long workout this week: perhaps Saturday you go for a 40–45 minute session (most of it recumbent or a mix; you could do 20 min recumbent bike + 20 min walk). This is to test your endurance. Continue with a mix of 3 upright / 2 recumbent days (or 3 and 3 if doing 6 days). On an upright day, if you’re feeling good, you might try something a bit more vigorous like a short elliptical session or even a light aerobics routine in your living room (there are seated aerobic exercise videos or low-impact standing cardio routines – just avoid any jumping). By now, your cardiovascular system has adapted considerably: studies show POTS patients after training pump more blood (have larger stroke volume) and lower resting heart rates. You might personally notice you can accomplish more before symptoms force you to stop. This week is about discovering those new limits – but do not overdo it to the point of severe exhaustion or injury. Keep one day as an active recovery (gentle stretching, leisurely stroll, etc.).
- Strength (2x per week): At this point, your strength sessions should ideally be at full volume: two sessions of about 30–40 minutes each, covering 8–10 exercises total (if we count every different exercise). You might be doing 3 sets of 15 or even more for bodyweight moves. You should be appreciably stronger than Week 1 – for example, maybe you can now do 15 full bridges whereas initially 5 was hard, or you can hold a plank for 30 seconds, etc. This translates to better muscle pump for your blood circulation. Continue to focus on form and not straining your neck or back. If you want, this week you can introduce Pilates Reformer routine that is low to intermediate level. Make sure to take a day off after each strength day for muscle recovery.
- Well-being: At Week 10, many patients report noticeable improvements in their quality of life – perhaps you can concentrate better, have fewer near-fainting episodes, or can return to activities you enjoy in moderation. The science behind this is encouraging: structured exercise programs have been shown to increase cardiac size, increase blood volume, and improve functional capacity and mood in POTS and hEDS patients. It helps patients with EDS become more stable. Remind yourself of how far you’ve come. Continue all supportive measures (fluid, salt, compression, etc.) consistently; these are lifelong habits, not just during the 12-week program. If you’ve been successful so far, consider mentoring or teaming up with a fellow POTS or hEDS patient for the last two weeks – sometimes having a buddy (even virtually) can keep you motivated to finish strong.
Week 11 – Almost There (Maximizing Upright Tolerance)
Focus: In this penultimate week, the emphasis is on being able to do sustained upright exercise comfortably, which is a major marker of improved orthostatic tolerance. We will continue to mix exercise modes but lean heavily on upright forms now. If you are here, give yourself a pat on your back.
- Cardio (5–6x per week): If you’re able, do 4 days of upright cardio and 1–2 days of recumbent this week. The upright sessions can be 25–30 minutes each. Options include brisk walking (perhaps even on a slight incline or outdoor with slight hills if you can manage), upright cycling, elliptical machine. The recumbent session can serve as an easier day – maybe a swim day or a relaxed bike ride for 30 minutes. If all is going well, you could try combining upright exercises in one session to mimic more real-life activity – e.g., 15 minutes walking followed by 10 minutes light stair climbing (if you have stairs at home, carefully going up and down at a measured pace) to build leg strength and heart fitness together. By now your heart rate during moderate exercise may have come down compared to when you started, meaning you can do more with less tachycardia – that’s a great sign of reconditioning. Keep using a warm-up and cool-down, especially as intensity increases – abruptly stopping upright exercise can cause blood to pool and make you dizzy, so always cool down gradually (e.g. finish a walk with 5 minutes of slow strolling or seated pedaling).
- Strength (2x per week): Continue twice-weekly sessions. At Week 11, you might integrate strength training into circuit-style or functional workouts if you wish. For example, you could do a circuit of: 10 push-ups (against a wall or knees on floor), 20 second plank, 10 calf raises – and repeat that circuit 3 times. This intermixes strength and a bit of cardio, and is somewhat upright, giving a more real-world challenge. Circuit training can be time-efficient, but if it makes you lightheaded, return to doing exercises one at a time with rest. The main goal is to ensure your leg muscles are as robust as possible as we near the program’s end. You may also want to test some functional strength tasks: for example, practice going from sitting on the floor to standing up (using hands as needed) a few times – this mimics daily life situations and can build confidence that you won’t get dizzy doing so.
- Reflection and Maintenance Plan: As you approach the end of the 12-week protocol, start thinking about your long-term maintenance plan. The evidence suggests that continuing this level of exercise (around 30–60 minutes most days of the week) is what keeps symptoms at bay. The Chopra Protocol is not a one-time fix but rather a jump-start to a lifestyle. By Week 11, you should plan how you will keep exercising beyond Week 12 – pick activities you enjoy! Whether it’s cycling, swimming, or joining a class (if you’re able), the best exercise is one you’ll stick with. You might even start to wean off some specific supports (for instance, some people find they no longer need to wear compression shorts daily once they’re very fit – though others continue to benefit; see what works for you).
Week 12 – Graduation and Beyond
Focus: Congratulations, you’ve reached Week 12! This week is about demonstrating to yourself how far you’ve come and setting the stage for continuing these healthy habits indefinitely. We’ll solidify the routine that you can carry forward.
- Cardio (5–6 x per week): By the end of this week, attempt at least one session of 40–45 minutes of continuous exercise. For example, you could do a 45-minute workout consisting of mostly upright work (say, 30 minutes walking or biking, followed by 15 minutes on a recumbent bike as a cool-down). This would mirror the goal of the formal protocols where by 3 months patients are exercising 45–60 minutes per session, 5–6 days per week. It’s okay if you’re not quite at 45 minutes nonstop – even 30 minutes is a huge accomplishment if done regularly. The key is you are now able to do substantial exercise most days, whereas 3 months ago you perhaps could not. Plan this week’s schedule similar to Week 11 (majority upright sessions). You might try a new enjoyable activity as a reward – for instance, a gentle group exercise class or a bike ride outside with a friend (just avoid very hot weather). The variety can keep things interesting. Ensure you cooldown and also savor the fact that you’re working out like a “normal” person now – an incredible feat given where you started.
- Strength (2x per week): Finish strong with your two strength days. You might test your improvements: compare how many repetitions of key exercises you can do now vs Week 1. Maybe in Week 1 you could barely do 5 wall push-ups and now you can do 15, or your balance on one leg has improved, etc. If you have access to a gym, you could do a session using more advanced equipment just to experience it but it’s not necessary. What’s important is that your lower body and core are much stronger now, which will support your blood pressure when upright. Continue to avoid heavy free-weight overhead lifts or anything that makes you strain hard; safety first. After this week, you should continue strength training twice weekly as part of your lifestyle – it will maintain muscle mass and circulation benefits. Remember to avoid any neck or head extension.
- Graduation and Next Steps: Week 12 marks the end of the structured Chopra Protocol, but it’s truly the beginning of a new chapter. By consistently following this program, you have likely reversed much of the deconditioning that contributes to POTS and hEDS. You’ve expanded your blood volume (with all that water and salt) and trained your vessels and muscles to handle standing better. Many patients at this point find their resting heart rate is lower, and their POTS symptoms are milder – perhaps you can stand up without immediate dizziness, or you can do daily tasks with less fatigue. To keep these gains, maintain an exercise routine indefinitely. You don’t need to keep increasing intensity endlessly; simply keep up a regimen of cardio (at least 30 minutes, 4–5 times a week) plus strength work. You can choose activities you enjoy – the structure can be looser now since you know your body’s capabilities. Also continue the core non-pharmacological practices (hydration, salt, compression as needed, etc.) as these will always support you, especially on high-symptom days or during illnesses. If you ever have a setback (e.g., a flare or a hiatus from exercise due to illness), don’t despair – you can return to a lower week’s level and ramp up again. This protocol can be repeated or modified any time you need a tune-up.
Final Thoughts: The Chopra Protocol has hopefully equipped you with the knowledge and confidence that you have control over POTS – at least partially. Exercise truly is “medicine” for POTS and hEDS, and along with lifestyle adjustments it forms the cornerstone of treatment. It requires patience and commitment (it’s been a “long, tough road”), but by making it through 12 weeks, you’ve invested in your health without expensive interventions. Continue to work with your healthcare providers as needed, but know that the power of gradual, sustained exercise and self-care strategies can dramatically improve your quality of life with POTS and EDS. Celebrate your progress and keep moving forward – literally!
Medical and Legal Disclaimer
This document (“The Chopra Protocol for POTS”) is provided free for general informational and educational purposes only. It is not medical advice, and it is not intended to diagnose, treat, cure, or prevent any disease. Reading or using this protocol does not create a physician–patient relationship with Dr. Chopra or with any contributor.
Do not use this protocol as a substitute for individualized medical evaluation and care. Before starting, changing, or stopping any exercise, diet, hydration/salt strategy, compression use, or other health-related activity described here, consult your own physician or qualified health professional, especially if you are pregnant, have heart disease, hypertension, kidney disease, a history of fainting with injury, significant arrhythmias, seizures, or any other serious medical condition.
Stop and seek medical care immediately if you experience chest pain, severe shortness of breath, fainting with injury, new neurologic symptoms, severe palpitations, or any symptoms you consider emergent.
Use of this information is at your own risk. The authors/publishers assume no responsibility or liability for any injury, loss, or damage incurred as a result of the use or misuse of the information in this protocol.
Copyright + Free Public License (recommended for “freely available”)
Copyright © 2026 Pradeep Chopra, MD. All rights reserved.
This work is licensed under the Creative Commons Attribution–Non Commercial–No. Derivatives 4.0 International (CC BY-NC-ND 4.0) license. You may copy and redistribute this material in any medium or format for noncommercial purposes, as long as you provide appropriate attribution, include this copyright notice, and do not modify or create derivative works. You may not charge or provide services in leu of this document, it is free for anyone to use.
Suggested attribution: “The Chopra Protocol for POTS © 2026 Pradeep Chopra, MD. Used under CC BY-NC-ND 4.0.”
Disclaimer:
The information provided on this website is intended for informational purposes only and should not be considered a substitute for professional medical advice, diagnosis, or treatment. It is also not intended to serve as legal advice or replace professional legal counsel. While efforts have been made to ensure the accuracy of the information, there is no warranty regarding its completeness or relevance to specific medical and legal situations. As medical information continuously evolves, users should not rely solely on this information for medical or legal decisions and are encouraged to consult with their own physician or qualified attorney for any legal matters or advice.
Copyright 2025 Pradeep Chopra. All rights reserved.
More insights from the experts

The information provided on this website is intended for informational purposes only and should not be considered a substitute for professional medical advice, diagnosis, or treatment. It is also not intended to serve as legal advice or replace professional legal counsel. While efforts have been made to ensure the accuracy of the information, there is no warranty regarding its completeness or relevance to specific medical and legal situations. As medical information continuously evolves, users should not rely solely on this information for medical or legal decisions and are encouraged to consult with their own physician or qualified attorney for any legal matters or advice.